What tools do you need to make the perfect polymer clay earrings?
Polymer Clay is a medium that can easily be worked on in your home. It’s easy to buy little blocks of coloured clay, and mix it up into the perfect shade! Just the right thing for your next home hobby project. But if you don’t want to DIY, then the range of polymer clay earrings and pendants at On A String might be just right for you.
 |
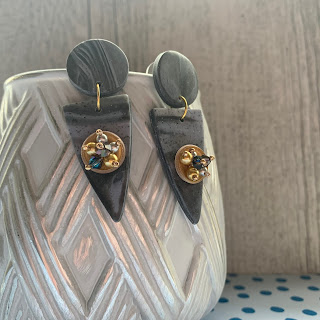
| Polymer Clay Earrings designed by Paula at On A String |
The tools you need are already in your house…..
- An oven
- An oven thermometer
- Rolling pins
- A ceramic tile
- Baking Paper
- Cookie Cutters
Why do you need an oven?
Polymer clay pieces are cured by baking at approximately 130 degrees, for between 30 and 40 minutes - and you can use your own oven to do it. Whilst some professionals will use a stand alone bench top oven, I’ve found that using my household oven is perfectly fine for making polymer clay earrings. I make sure that I use a tray to hold them that doesn’t have food items on it.
I also use an oven thermometer to ensure I get consistent temperature for baking my polymer clay pieces. Once they’re cooked, I just take them out of the oven to cool down, and then they’re ready for the next stages – sanding, attaching beads and polymer clay earring findings.
Rolling Pins and Cookie Cutters
Like your household oven, you probably have rolling pins and cookie cutters – these are great for creating your polymer clay shapes. With a couple of ‘guides’ to keep your rolling pin at the same depth, you can roll out your clay to a consistent depth each time. I use two plastic rulers to hold my depth guide for the clay easily. Some clay is rolled to a thinner standard (2mm and under) for layering, or if it is a single layer between 3 and 4mm is perfect for creating a sturdy clay piece.
Your cookie cutters give great shapes – I’ve got a mini set that are just right for baking biscuits – but I use them to make heart, diamond and circle shapes!
Ceramic Tile and Baking Paper
A ceramic tile is perfect for rolling out your clay, and can also be used as an oven tray – I went to Bunnings and picked up a single white high gloss ceramic tile to use.
Baking paper is another great kitchen hack for polymer clay. You can use it to move pieces around on your ceramic tile base, and to have underneath your clay on the tray when baking.
What else do you need to use polymer clay at home?
Using a colour wheel and your imagination helps for creating colour mixes that are not ‘standard’ from the polymer clay blocks. A white clay is a standard for creating pastel effects, whilst clays that have glitter in them are perfect for adding a bit of sheen and glimmer to your pieces.
You will also need to source some clay to play around with – three to five colour blocks is a good start using a colour wheel method to create your own colour combinations.
Tip
Write down the exact proportions of clay you use in each mix, as it is hard to recreate something you love if you can’t remember the quantities of each colour used.


Comments
Post a Comment